

Quick Answer
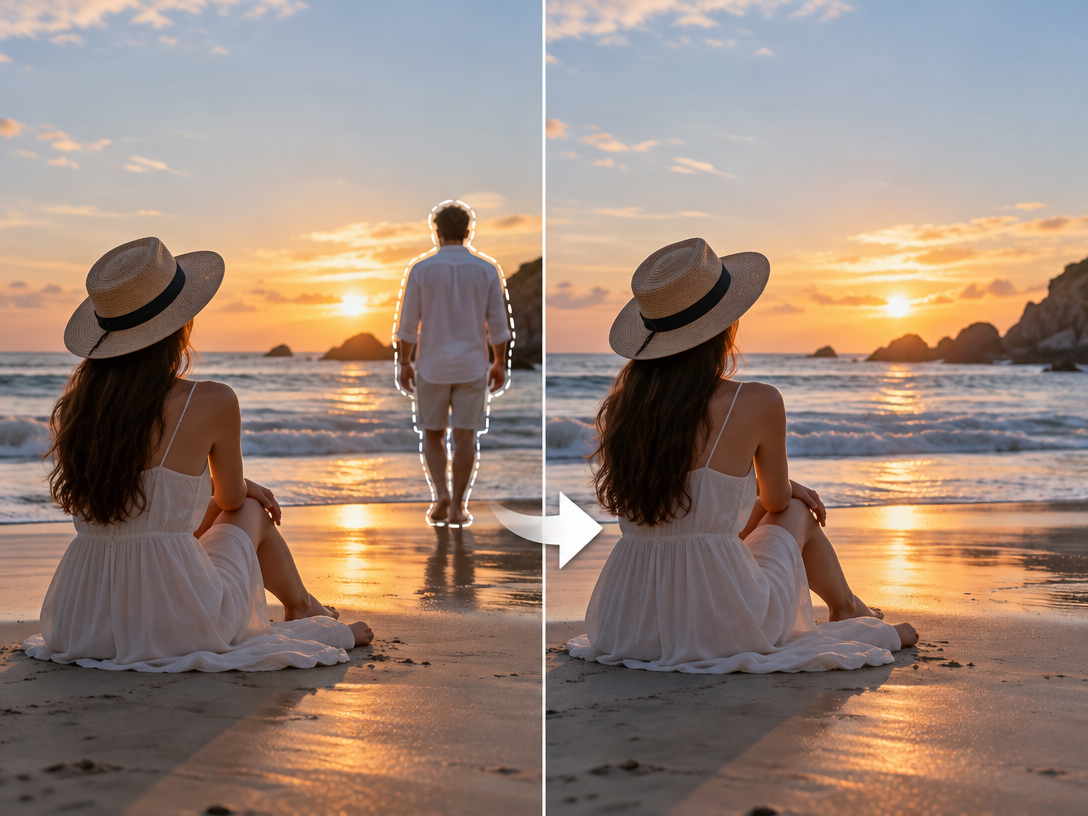
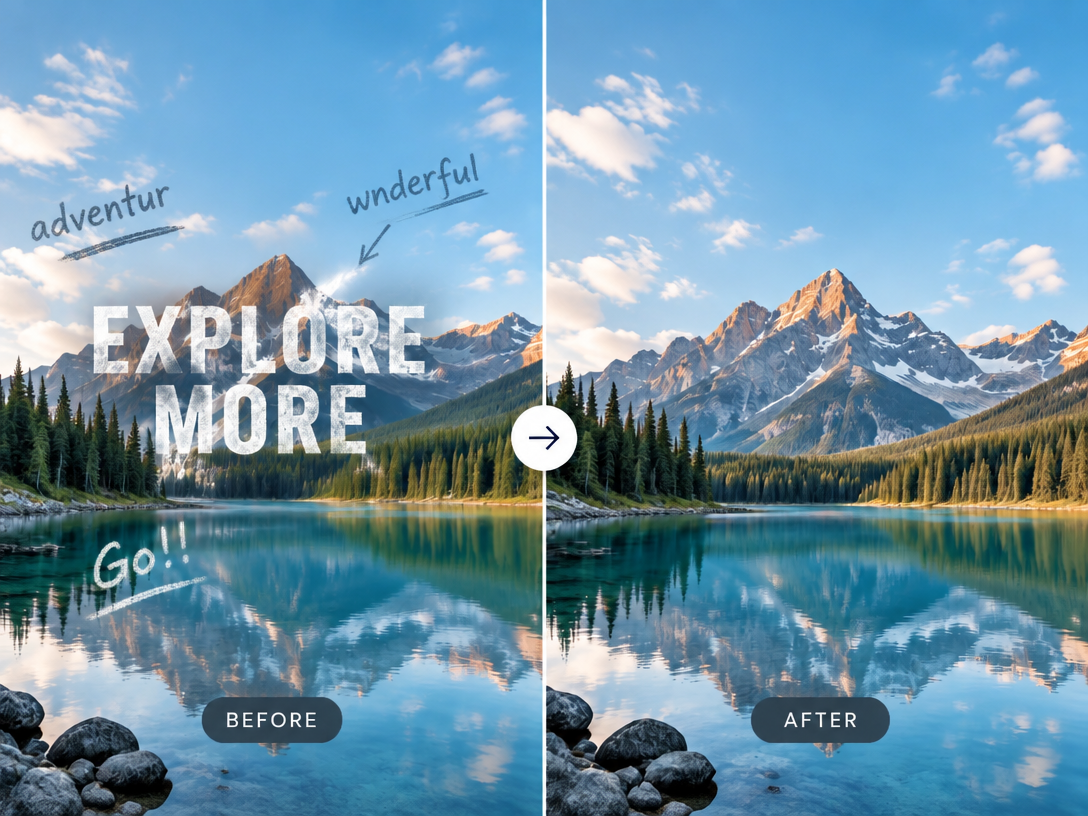
The fastest way to remove text from a picture is a prompt-based AI image editor: upload the image, type "remove all text," and let the model rebuild the background.
For one throwaway image, a free online text remover is faster.
For repeat or commercial work, Photoshop's Content-Aware Fill or Generative Fill gives you pixel-level control. Results are clean only when the text sits on top of a continuous, simple background.
| Question | Short answer |
|---|---|
| Can you remove text from a picture? | Yes — when the text is an overlay and the background continues behind it |
| Best method? | Prompt-based AI for textured or creative work; Content-Aware Fill for precision |
| Free option? | Yes — browser removers and GIMP cover single images |
| Will the background match perfectly? | On flat backgrounds, yes. On faces, hair, or crowd texture, rarely on the first pass |
| Legal? | Only on images you own or have licensed |
Why Removing Text Is Harder Than It Looks
Text removal is inpainting: the tool deletes the letters, then invents what was behind them. It is guessing, not restoring.
| Background behind the text | Typical result |
|---|---|
| Sky, wall, paper, plain fabric | Near invisible |
| Repeating pattern (bricks, tiles) | Pattern breaks or repeats wrongly |
| Grass, hair, crowd, fine texture | Smeared patch |
| Text over a face, hand, or product logo | Usually damaged |
| Hairline or semi-transparent white font | Ghost letters left behind |
The common complaint on r/photoshop is not "the tool failed" — it's "the tool half-worked," leaving a smudge or letter fragments. This thread on transparent text watermarks collects the standard fixes: clone stamp, retouch, lasso-plus-Content-Aware.
Method Comparison: Match the Method to the Background
| Method | Best for | Feasibility | Cost | Survives textured backgrounds |
|---|---|---|---|---|
| 1. Prompt-based AI editing | Complex scenes, creative work | High — no masks, background-aware | Freemium | Yes |
| 2. Free online remover | One image, simple background | High on flat surfaces, low on texture | Free | Sometimes |
| 3. Photoshop CAF / Generative Fill | Precision, batch, commercial | Medium — per-pixel control, needs tuning | Paid | With sampling tweaks |
| 4. GIMP Heal / Clone | Free desktop control | Medium — same engine, more steps | Free | Sometimes |
| 5. Mobile (Photos, Snapseed) | Quick social posts | Low — small canvas, coarse fill | Free | Rarely |
| 6. Delete the text layer | Text you originally added | Highest — zero pixel loss | Free | Always |
Method 1: Prompt-Based AI Editing with Pixmax — Best for Creative Work
Pixmax brings image generation, editing, and animation into one creative workspace. After removing unwanted text, you can continue refining the same asset or turn it into an animated visual without moving files between separate apps. This makes prompt-based editing especially useful when the cleaned image is part of a larger creative workflow.
Steps to Remove Text From a Picture
- Open Pixmax and start a new image project.
- Click "+" to add an image node. Nano Banana Pro on Pixmax supports natural-language editing of backgrounds, objects, lighting, and specific visual elements. Other AI image modes also available for you.
- Drop in the image that contains the text.
- Write the instruction: "Remove all text, captions, logos, and watermarks. Keep everything else unchanged."
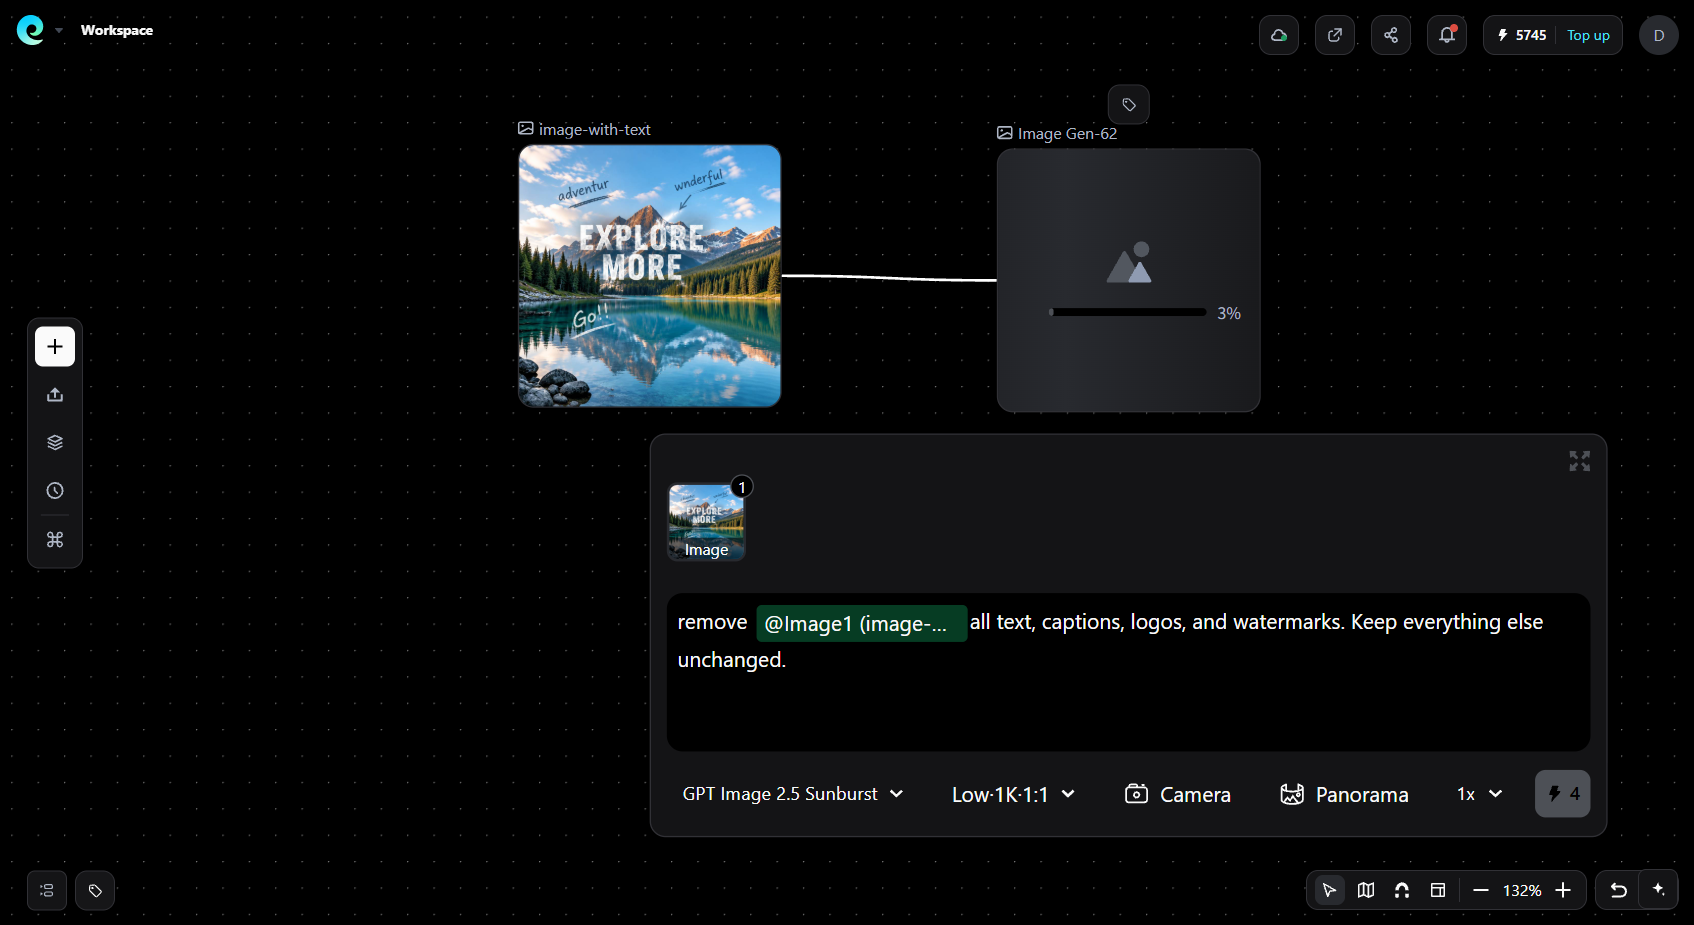
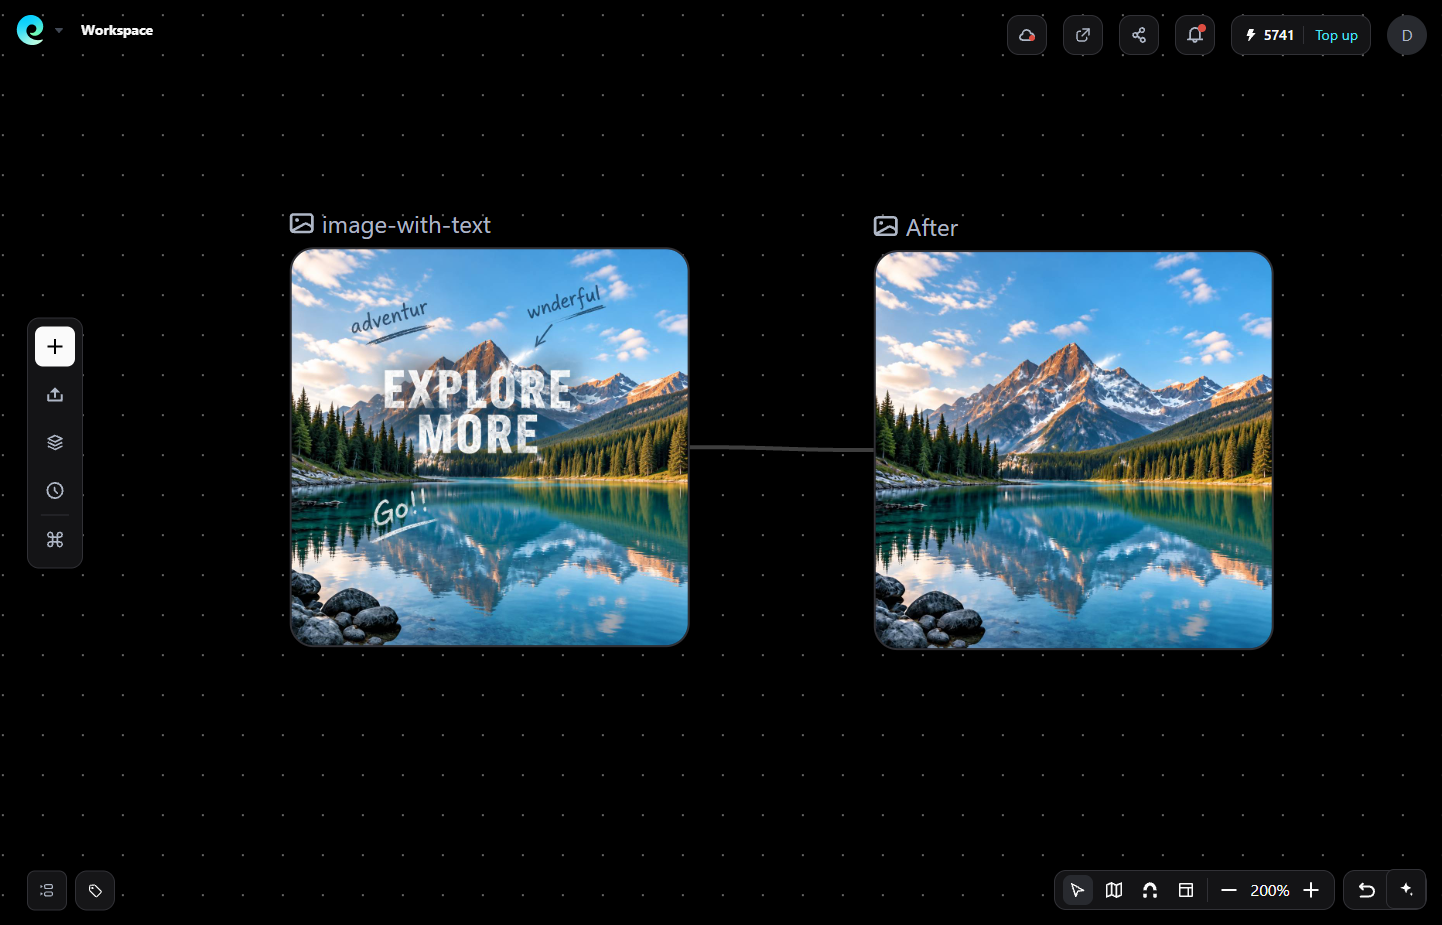
- Generate. Zoom to 100% and inspect edges, letter fragments, and colour drift.
- If a ghost letter survives, crop to it and re-run — don't regenerate the whole frame.
- Save the clean result to your Asset Library if you'll reuse it.
Watch Out for These Issues
- Full-frame regeneration can change the image’s color, composition, or fine details. Treat any change outside the text area as a defect.
- Smaller regions are usually easier to reconstruct accurately than large ones. Edit a focused crop first, then recombine it with the original if necessary.
- Busy backgrounds may require one to three passes. The main challenge is preserving visual consistency, not simply removing the text.
Method 2: Free Online Text Removers — Fastest for A Single Image
A dedicated text remover detects lettering, erases it, and repaints the background automatically, often without manual brushing.
Steps
- Pick a browser tool and upload a JPG, PNG, or WebP.
- Let auto-detect find the text, or paint over it yourself.
- Compare, then refine leftover fragments in a second pass.
- Download at full resolution.
What to know
- Paint slightly larger than the text — it gives the model cleaner context. Auto-detect is fast but leaves more residue; brush-driven tools trade speed for control.
- Keep your original file. Credible tools save a new result rather than overwriting — verify that first.
Method 3: Photoshop Content-Aware Fill and Generative Fill — Most Control
Content-Aware Fill replaces a selection using surrounding pixels; Generative Fill writes new content from a prompt, or fills from context when you leave the prompt blank.
Steps (Content-Aware Fill)
- Duplicate your background layer first — set Output Settings to Duplicate Layer so the original survives.
- Select the text with Object Selection, Quick Selection, or Magic Wand.
- Right-click inside the selection → Content-Aware Fill.
- Adjust the sampling area so it excludes the object but includes clean background.
- Click OK.
- Use Subtract mode to protect areas you don't want sampled.
- Clean leftovers with the Spot Healing Brush.
Steps (Generative Fill)
- Define the area with a selection tool.
- Choose Generative Fill.
- Enter a prompt describing the surface, or leave it blank to fill from surrounding pixels.
- Hit Generate and pick a variation.
See Adobe's Content-Aware Fill reference for the sampling and fill options.
Method 4: GIMP — Free, Desktop, More Steps
GIMP is a free, open-source editor that does the same job with Heal Selection and the Clone tool.
Steps
- Open the image and create a new layer with an alpha channel.
- Use Free Select (Lasso) to trace tightly around the text.
- Go to Filters → Enhance → Heal Selection.
- If it's off, use the Clone tool with a soft-edged brush and source a nearby patch of similar colour. Don't hand-paint.
- Zoom to 100% and check edges.
The r/GIMP consensus: clone from an adjacent region with matching texture rather than mixing colours by eye.
Method 5: Mobile — Google Photos Magic Eraser and Snapseed
Both are free phone-first tools that erase text where you brush.
- Google Photos: open photo → Edit → Tools → Magic Eraser → brush over the text → Remove.
- Snapseed: open → Healing tool → brush over the text.
Good for social posts. Not for print or client deliverables — mobile fill quality drops fast on texture.
Method 6: Delete the Text Layer — The Only Truly Lossless Option
If the text is still a separate layer in a PSD, AI file, Figma, or Canva design, delete the layer instead of erasing pixels.
Any inpainting method destroys real image data. Deleting a layer doesn't. Check first — five seconds, perfect result.
What Actually Fails, and How to Fix It
| Failure | Cause | Fix |
|---|---|---|
| Ghost letter outlines | Mask too tight | Expand the mask ~20px past the glyphs |
| Smudged patch | No clean nearby context | Enlarge the sampling area or pick a cleaner region |
| New marks appear | Generative model inventing content | Re-run on a smaller crop; lower denoise if exposed |
| Whole background shifted | Full-frame regeneration | Compare against the original; re-run with a stricter prompt |
| Original image lost | No duplicate made | Always work on a copy; keep the source file |
| Residue on hairline fonts | Mask can't separate thin strokes | Manual healing brush; expect manual work |
Know your text type. Modern image models distinguish artificial text (watermarks, logos, discount badges added in post) from natural text (signage, clothing lettering, road signs) — Photoroom exposes this as explicit API modes. Natural text removal degrades a scene's realism; artificial text removal is nearly always safe.
Is It Legal to Remove Text from a Picture?
Only on images you own or have licensed.
| Legitimate | Not legitimate |
|---|---|
| Removing your own watermark from your own work | Stripping a watermark to use unlicensed stock |
| Cleaning licensed stock you already paid for | Deleting required Creative Commons attribution |
| Removing outdated promo text from your assets | Erasing source credits from documentary photos |
| Clearing debug labels from your screenshots | Altering prices, dates, or evidence in documents |
A copyright watermark is the record of payment. Remove it to dodge a licence and you've infringed. Blur license plates for privacy — that's redaction, not a workaround.
FAQs
Is Removing Text From a Picture Free?
Yes, for single images. Browser removers and GIMP are free; Photoshop and premium AI models are paid.
What's the best app to remove text from pictures?
Prompt-based AI models for textured or creative work, Content-Aware Fill for precision, clone and healing for flat backgrounds.
How do I remove text from a picture without damaging the background?
Expand the mask ~20px past the letters, keep the edited region small, and inspect at 100% zoom.
Can AI remove handwritten or thin stylized fonts?
Poorly. Hairline strokes leave traces that need manual cleanup.
Can I remove text from a screenshot?
Yes — screenshots are the easiest case because UI backgrounds are flat and continuous.
Does removing text reduce image quality?
Re-encoding to JPEG does. Keep the original, export as PNG, and never overwrite the source.
How do I remove text from a picture in one click?
Use an auto-detect remover or a prompt-based model, then still verify the result. There is no true one-click fix on complex backgrounds.